IOFireBug – first project
This tutorial will explain the basics of implementation IOFireBug Engine library and its communication with computer using C# code.
Following features will be explained:
- Digital outputs
- Digital inputs
- Analog inputs
- Rotation encoders
Recommended procedure before coding is to try desired features using our device-tool application, available for download in download section. This will minimize any issues in the feature, especially due to incorrect wiring or other problems.
Demonstration will be shown in Microsoft Visual Studio 2015 IDE, using WPF application project.
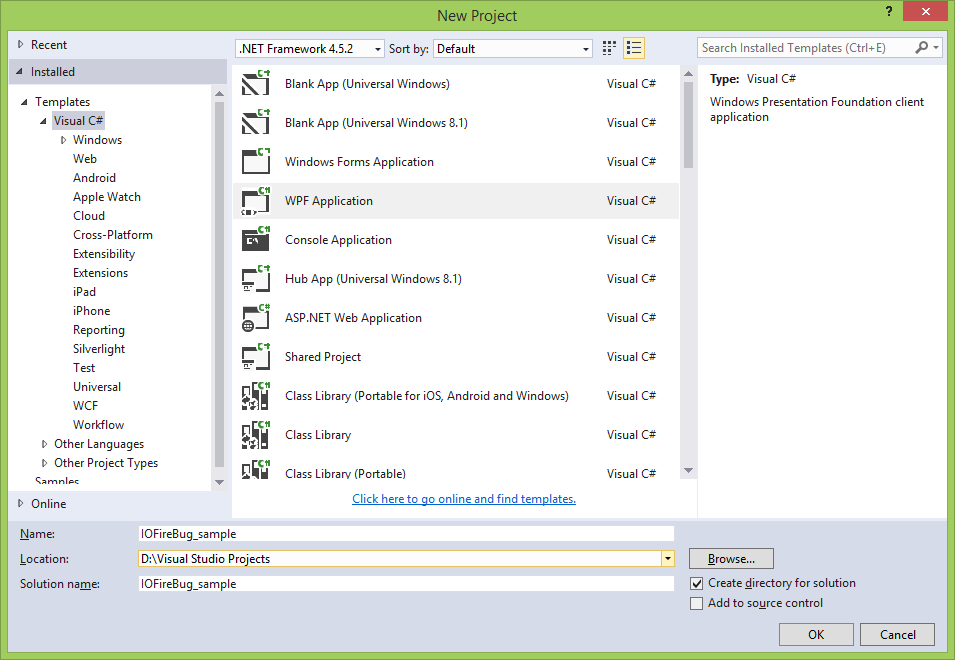
First step in VS is to create new project selecting: „File -> New -> Project“, or utilize shortcut on main page.
In „New Project“ window, we want to use WPF application. Target framework is left default, in our case 4.5.2 version. Give project name and location, the select “OK”.
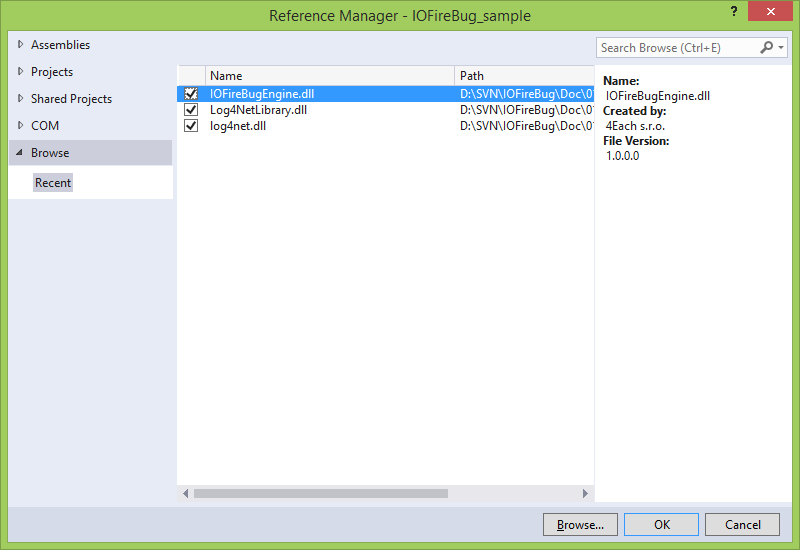
Before writing any code, we will first add references for IOFireBug libraries.
Latest version of libraries is available for download in download section.
We are interested in following libs:
- IOFireBugEngine.dll – IOFireBug main lib
- log4net.dll – Supporting lib for diagnostics and logging
- Log4NetLibrary.dll – Supporting lib for diagnostics and logging
Right click on “references” in “solution explorer”, then “add reference”. Select browse and find libs mentioned above.
All imported libraries should appear in list of references.
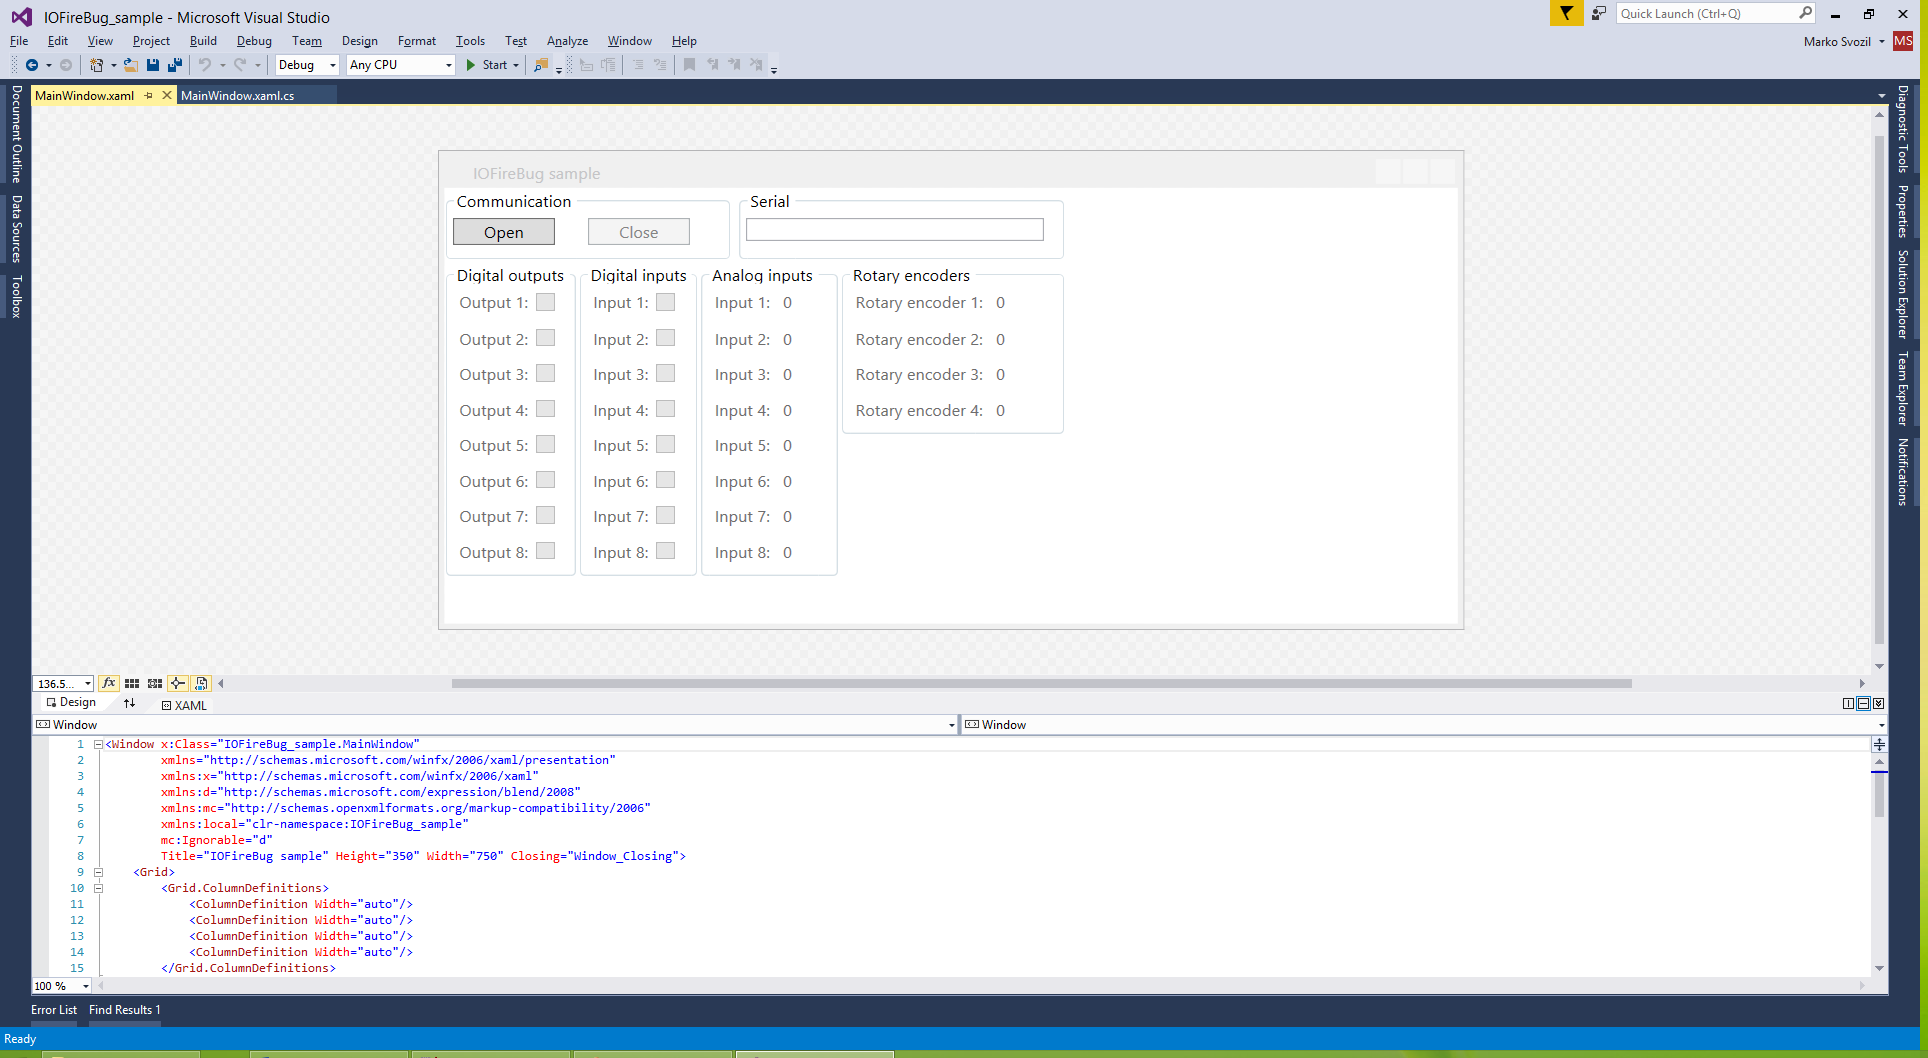
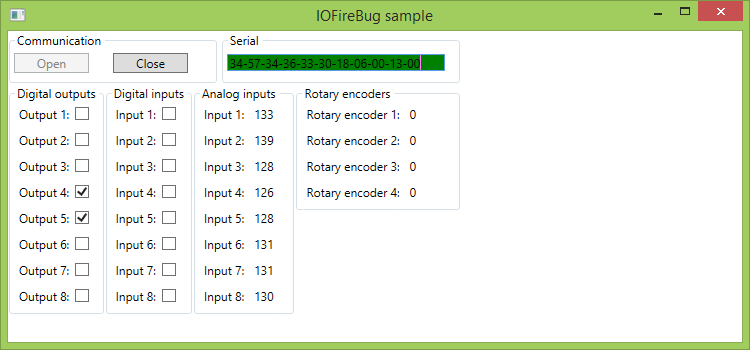
We will start off with graphical user interface. We will assume you know basics of XAML design.
Our GUI consists of two buttons on top for opening and closing communication with IOFireBug Engine board. Next to the right is textbox for filling in the serial number.
Below are I/O ports in columns with label and checkbox, all within groupboxes:
- Digital outputs (8 ports)
- Digital inputs (8 ports)
- Analog inputs (8 ports)
- Rotation encoders (4 ports)
Checkboxes are used to change state of outputs, so we will register new “Click” event. Every checkbox will register the same method, in this case „checkBoxDigitalOutput_Changed“.
Serial number textbox is checking its contents and change background color according to format of serial number. Correct format will give green, otherwise red. Control is done by “txbSerial_TextChanged” method.
Note.: This serial number check is only for correct formatting, not for serial number validation. Incorrect number in right format will appear green, and will not communicate with IOFireBug Engine board.
For better clarity, we also implement GUI indication of opened communication. When communication is closed, all groupboxes become grey – disabled. Complete XAML code is available in attached solution.
Finally, we are ready to start writing C# code. Switch to “MainWindows.xaml.cs”, either by solution explorer, or by pressing F7 from XAML editor.
First, add „using IOFireBug“ and „using Windows.Threading“ on top, to make referencing namespaces much easier in the future.
Just before “MainWindow“ class constructor, declare following objects „IOFireBugDeviceV1“ a „IOFireBugComm“.
To further increase simplicity, we add “baundrate” and “address” constants. These will be used multiple times during this tutorial, so it’s beneficial to have them set once. Set both by your individual setup, in our case it’s 115200 for baundrate and 1 for address.
Next global variable is “serial“, which is used to authenticate your license providing serial number. Note that it’s not constant, because it is changed by that textbox defined earlier.
using System.Windows;
using IoFireBugEngine;
using System.Windows.Threading;
using System;
using System.Windows.Media;

namespace IOFireBug_sample
{
    /// <summary>
    /// Interaction logic for MainWindow.xaml
    /// </summary>
    public partial class MainWindow : Window
    {
        IoFireBugDeviceV1 Device;
        IoFireBugComm Comm;

        const int baundrate = 115200;
        const int address = 1;

        byte[] serial = null;

        public MainWindow()
        {
            InitializeComponent();
        }
    }
}
The code will be divided into following methods:
- IOFireBugInitialize – Initialization and communication start
- IOFireBugClose – communication close
- GuiState – changes the GUI according to communication
and event handlers:
- IOFireBugData_Changed – incoming message, pins changed
- checkBoxDigitalOutput_Changed – outgoing message, request to change outputs
First comes “IOFireBugInitialize“. We have to initialize object “IOFireBugDeviceV1“ declared earlier. We use blank constructor without parameters, and set following properties:
- Device.Control.Addr
Sets address of IOFireBug Engine board. Address is determined by the state of DIP switch located on the board physically. See documentation for more about addressing. In our case, we set address property by assigning value from “address“ constant.
- Device.Control.BinInputsFnc
- Device.Control.AnalogInputsFnc
- Device.Control.RotaryCountersFnc
These properties determine the period of data receive. It is possible to get data periodically, however very elegant solution is to set „ON_CHANGE“, witch fires only when some of the ports changes value. This is very useful for digital inputs, however I cannot bet set on analog inputs, because of inevitable interference. So, to have instant response, we set analog value to “ON_PER_50MS“, reading periodically every 50 milliseconds. To set these properties, we use build in enum constants and converted to byte.
Device = new IoFireBugDeviceV1();
Device.Control.Addr = adress;

Device.Control.BinInputsFnc = (byte)IoFireBugConst.BIN_INPUT_FUNCTION.ON_CHANGE;
Device.Control.AnalogInputsFnc = (byte)IoFireBugConst.ADC_FUNCTION.ON_PER_50MS;
Device.Control.RotaryCountersFnc = (byte)IoFireBugConst.ROTARY_COUNTERS_FUNCTION.ON_CHANGE;
We continue to set “Device” object
- Device.Config.FtdiBaudrate
- Device.Config.BinInputsFilterLen
- Device.Config.BinInputsSamplePeriod
These properties define baundrate, which again is set by constant, and input filtering to achieve certain level of hysteresis on inputs.
Device.Config.FtdiBaudrate = baundrate;
Device.Config.BinInputsFilterLen = 4;
Device.Config.BinInputsSamplePeriod = 4;
Another pretty complex configuration is for analog inputs. For detail consult documentation.
Device.Config.AdcEnable = true;
Device.Config.AdcFreqHz = 1000000;
Device.Config.AdcInputFrom = 0;
Device.Config.AdcInputTo = 7;
Device.Config.AdcAverages = 1;
Device.Config.AdcRightZeros = 0;
Device.Config.AdcResolution = IoFireBugConst.ADC_RESOLUTION.ADC_12BIT;
Device.Config.AdcMultiplier = 1;
Next step is to set serial number. Predefined “serial” variable is either null, or it has value of serial number written in textbox. We test for null possibility and act accordingly.
if (serial == null)
{
    MessageBox.Show("Invalid serial number!");
    return;
}

Device.Control.Serial = serial;
Finally we initialize “IOFireBugComm“ object, give it’s constructor needed data, including COM port, baundrate and timeout period.
Konstruktor požaduje identifikaci COM portu, rychlost přenosu a čas pro timeout komunikace.
Add “Device“ instance by adding to device list by calling method “AddDevice”. Last step is to start communication.
Comm = new IoFireBugComm("COM3", baundrate, 200);
Comm.AddDevice(Device);
Comm.Start();
Because communication was opened, we call method “GuiState” and implement it in the same time. Basically it only changes “IsEnabled” properties.
private void GuiState(bool communicationOpen)
{
    grpBoxDigitalOutputs.IsEnabled = communicationOpen;
    grpBoxDigitalInputs.IsEnabled = communicationOpen;
    grpBoxAnalogInputs.IsEnabled = communicationOpen;
    grpRotaryEncoders.IsEnabled = communicationOpen;

    btnOpen.IsEnabled = !communicationOpen;
    btnClose.IsEnabled = communicationOpen;
}
To catch incoming data, we register event “Device.Data.PropertyChanged“. After writing += VS will automatically offer to generate method for us, naming it „IOFireBugData_Changed“.
Method „IOFireBugInitialize“ ends with following code:
Comm = new IoFireBugComm("COM3", baundrate, 200);
Comm.AddDevice(Device);
Comm.Start();

GuiState(true);

Device.Data.PropertyChanged += IoFireBugData_Changed;
Next we will tackle generated method „IOFireBugData_Changed“. Create condition checking property „PropertyName“, which indicate where exactly the change occurred.
Because IOFireBugEngine library is running in its own thread, it is essential not to access GUI elements directly, because of cross-thread calling violation. To get around this problem, we use Dispatcher construct.
„e.PropertyName“ have following values:
- Inputs – digitální vstupy
- AdcValues – analogové vstupy
- RotaryCounters – rotační enkodéry
Application.Current.Dispatcher.BeginInvoke(DispatcherPriority.Normal, new Action(() =>
{
    if (Comm != null && Device != null)
    {
        if (e.PropertyName == "Inputs")
        {
            checkBoxDigitalInput1.IsChecked = Device.Data.Inputs[0];
            checkBoxDigitalInput2.IsChecked = Device.Data.Inputs[1];
            checkBoxDigitalInput3.IsChecked = Device.Data.Inputs[2];
            checkBoxDigitalInput4.IsChecked = Device.Data.Inputs[3];
            checkBoxDigitalInput5.IsChecked = Device.Data.Inputs[4];
            checkBoxDigitalInput6.IsChecked = Device.Data.Inputs[5];
            checkBoxDigitalInput7.IsChecked = Device.Data.Inputs[6];
            checkBoxDigitalInput8.IsChecked = Device.Data.Inputs[7];
        }

        if (e.PropertyName == "AdcValues")
        {
            lblAnalogInput9.Content = Device.Data.AdcValues[0];
            lblAnalogInput10.Content = Device.Data.AdcValues[1];
            lblAnalogInput11.Content = Device.Data.AdcValues[2];
            lblAnalogInput12.Content = Device.Data.AdcValues[3];
            lblAnalogInput13.Content = Device.Data.AdcValues[4];
            lblAnalogInput14.Content = Device.Data.AdcValues[5];
            lblAnalogInput15.Content = Device.Data.AdcValues[6];
            lblAnalogInput16.Content = Device.Data.AdcValues[7];
        }

        if (e.PropertyName == "RotaryCounters")
        {
            lblRotaryEncoder5.Content = Device.Data.RotaryCounters[0];
            lblRotaryEncoder6.Content = Device.Data.RotaryCounters[1];
            lblRotaryEncoder7.Content = Device.Data.RotaryCounters[2];
            lblRotaryEncoder8.Content = Device.Data.RotaryCounters[3];
        }
    }
}));
If we want to set outputs, we implement „checkBoxDigitalOutput_Changed“, method witch is linked to “Clicked” event on output checkboxes. Implementation is straight forward, we just set property “Comm.GetDeviceData(adress).Outputs” with bool array. This array is created and filled with data immediately, each bool set by “IsChecked“ property of desired checkbox.
private void checkBoxDigitalOutput_Changed(object sender, RoutedEventArgs e)
{
    Comm.GetDeviceData(adress).Outputs = new bool[]
    {
        (bool)checkBoxDigitalOutput1.IsChecked,
        (bool)checkBoxDigitalOutput2.IsChecked,
        (bool)checkBoxDigitalOutput3.IsChecked,
        (bool)checkBoxDigitalOutput4.IsChecked,
        (bool)checkBoxDigitalOutput5.IsChecked,
        (bool)checkBoxDigitalOutput6.IsChecked,
        (bool)checkBoxDigitalOutput7.IsChecked,
        (bool)checkBoxDigitalOutput8.IsChecked,
    };
}
It is polite to clean after yourself, so we should close communication and dispose all objects when user clicks on close button, or closes entire application. To do just that, we create “IOFireBugClose“. At the same, we change the state of GUI to disabled, to indicate closed connection.
private void IoFireBugClose()
{
    if (Comm != null)
    {
        Comm.Close();
        Comm = null;
    }

    if (Device != null)
    {
        Device.Stop();
        Device.Data.PropertyChanged -= IoFireBugData_Changed;
        Device = null;
    }

    GuiState(false);
}
Last but not least we generate event handlers for buttons and closing application.
private void btnOpen_Click(object sender, RoutedEventArgs e)
{
    IoFireBugInitialize);
}

private void btnClose_Click(object sender, RoutedEventArgs e)
{
    IoFireBugClose();
}
private void Window_Closing(object sender, System.ComponentModel.CancelEventArgs e)
{
    IoFireBugClose();
}
Build solution and run application. Enter serial number and open communication. Analog inputs should hover around mid-range value, when not connected. When output checkbox is checked, led indication on IOFireBug Engine board should appear.
Basic tutorial is now finished, and now it is up to you how to utilize potential of IOFireBug Engine.
Entire solution is available for download in download section.